


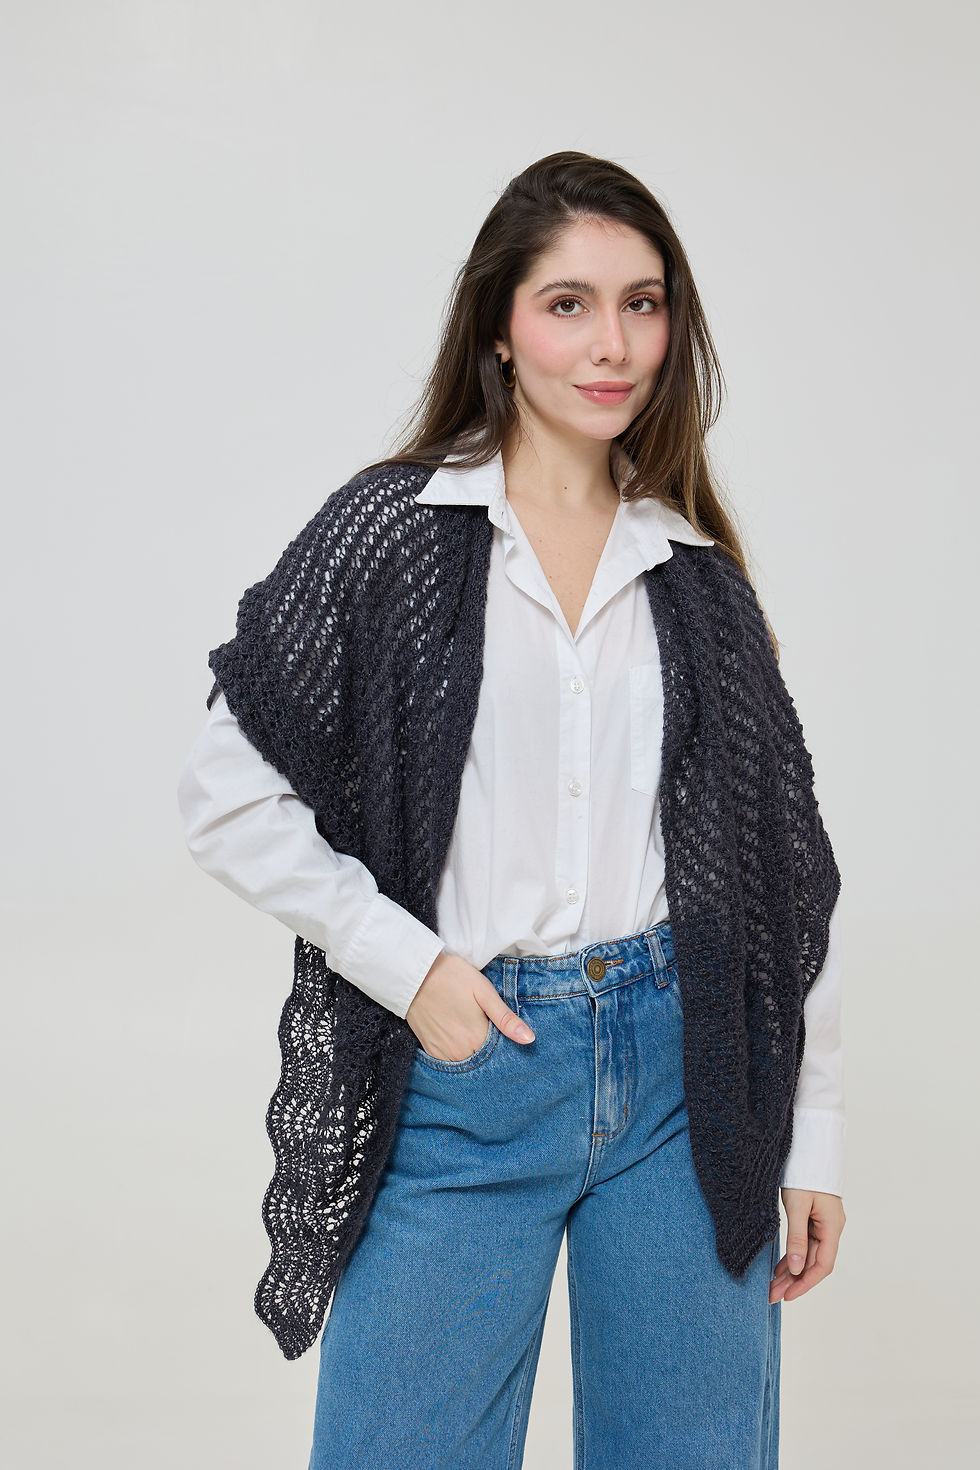
Aura Shawl
07/13/2026
Designer: Joana Gouveia
MATERIALS
• 3 skeins of Lolita yarn – Color 7683 Champagne
• US G/6 (4 mm) crochet hook
• Scissors
• Tapestry needle
INSTRUCTIONS
Skill Level: Intermediate
Row 1:
Begin with a magic ring and work into the ring:
• ch 3 (counts as 1 dc)
• 2 dc
• ch 2
• 3 dc
• ch 2
• 3 dc
Tighten the magic ring.
Row 2:
Turn.
Ch 1.
Sl st in the 3rd dc.
Sl st into the ch-2 sp.
In the ch-2 sp work:
• ch 3
• 2 dc
• ch 2
• 3 dc
Note: Every row begins this way.
Ch 2.
In the next ch-2 sp work:
• 3 dc
• ch 2
• 3 dc
Note: Every row ends this way.
Row 3:
Turn and begin as established.
In the first ch-2 sp work:
• ch 3
• 2 dc
• ch 2
• 3 dc
Ch 3.
In the center ch-2 sp work:
• 1 sc
• ch 3
• 1 sc
• ch 3
In the last ch-2 sp work:
• 3 dc
• ch 2
• 3 dc
Row 4:
Begin as established.
Ch 3.
In the next ch-3 sp work:
• 1 sc
• ch 5
In the next ch-3 sp work:
• 1 sc
• ch 3
Finish the row as established:
• 3 dc
• ch 2
• 3 dc
Row 5:
Begin as established.
Ch 3.
In the first ch-5 sp work:
• 1 sc
In the next ch-3 sp work:
• 9 dc
In the next ch-3 sp work:
• 1 sc
• ch 3
Finish the row as established.
Row 6:
Begin as established.
Ch 3.
In the next ch-3 sp work:
• 1 sc
• ch 3
• 1 sc
Ch 4.
Work 3 sc across the 3 dc of the center motif.
Ch 4.
In the next ch-3 sp work:
• 1 sc
• ch 3
• 1 sc
Ch 3 and finish the row as established.
Row 7:
Begin as established.
Ch 3.
In the next ch-3 sp work:
• 1 sc
• ch 5
In the next ch-3 sp work:
• 1 sc
• ch 3
Work over the center sc of the previous row:
• 1 sc
• ch 3
In the next ch-3 sp work:
• 1 sc
• ch 5
In the next ch-3 sp work:
• 1 sc
Ch 3 and finish the row as established.
Row 8:
Begin as established.
Ch 3.
In the next ch-3 sp work:
• 1 sc
In the next ch-5 sp work:
• 9 dc
In the next ch-3 sp work:
• 1 sc
• ch 3
In the next ch-3 sp work:
• 1 sc
In the next ch-5 sp work:
• 9 dc
In the next ch-3 sp work:
• 1 sc
• ch 3
Finish the row as established.
Row 9:
Repeat Row 6 as follows:
Begin as established.
Ch 3.
In the next ch-3 sp work:
• 1 sc
• ch 3
• 1 sc
Ch 4.
Work 3 sc across the 3 dc of the center motif.
Ch 4.
In the next ch-3 sp work:
• 1 sc
• ch 3
• 1 sc
Ch 4.
Work 3 sc across the 3 dc of the next motif.
Ch 4.
In the next ch-3 sp work:
• 1 sc
• ch 3
• 1 sc
Ch 3 and finish the row as established.
Row 10:
Repeat Row 7, adapting to the width of the shawl.
Begin as established.
Ch 3.
In the next ch-3 sp work:
• 1 sc
• ch 5
In the next ch-3 sp work:
• 1 sc
• ch 3
Work over the center sc:
• 1 sc
• ch 3
In the next ch-3 sp work:
• 1 sc
• ch 5
In the next ch-3 sp work:
• 1 sc
• ch 3
Work over the next sc:
• 1 sc
• ch 3
In the next ch-3 sp work:
• 1 sc
• ch 5
In the next ch-3 sp work:
• 1 sc
Ch 3 and finish the row as established.
Row 11:
Repeat Row 8, adapting to the width of the shawl.
Begin as established.
Ch 3.
In the next ch-3 sp work:
• 1 sc
In the next ch-5 sp work:
• 9 dc
In the next ch-3 sp work:
• 1 sc
• ch 3
In the next ch-3 sp work:
• 1 sc
In the next ch-5 sp work:
• 9 dc
In the next ch-3 sp work:
• 1 sc
• ch 3
In the next ch-3 sp work:
• 1 sc
In the next ch-5 sp work:
• 9 dc
In the next ch-3 sp work:
• 1 sc
• ch 3
Finish the row as established with:
• 3 dc
• ch 2
• 3 dc
Continue Working
Repeat Rows 9, 10, and 11, maintaining the same increase sequence until the shawl reaches the desired size.
Edging Row – Part 1
Turn.
Begin as established.
Then work:
• 3 dc in the first ch-3 sp
• ch 3
• 3 sc (1 sc in each of the 3 center dc)
• ch 3
Finish the row as established.
Edging Row – Part 2
Turn.
Ch 1.
Work 1 sc in each st.
In each ch-3 sp work 3 sc.
Continue in this manner to the end of the row.
Fasten off with a sl st.
Light blocking is recommended to open and define the stitch pattern.
Disclaimer: measurements are approximate due to differences between centimeters and inches, needle sizes and tension. All care has been taken to allow accurate completion of the pattern.


Comments