Merry Little Sweater
- Nov 13, 2025
- 6 min read


11/13/2025
Level of difficulty

Sizes: S (M, L, XL)
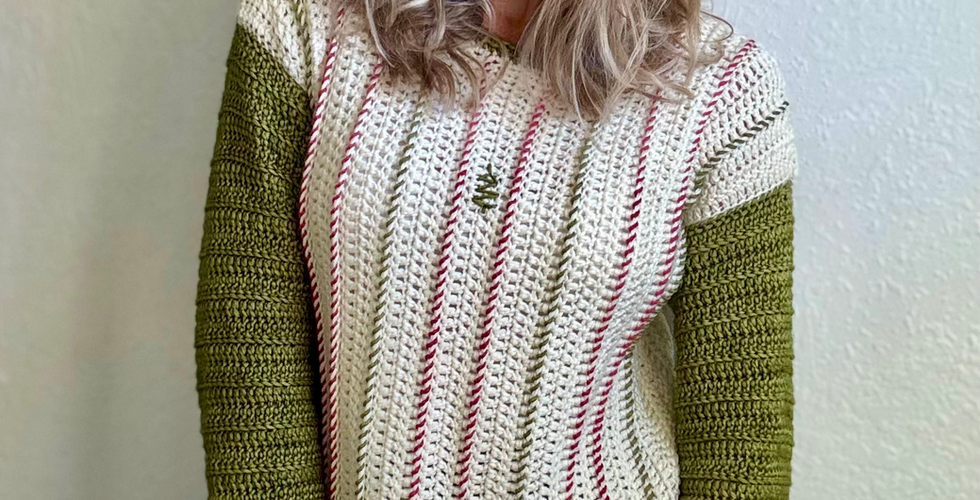
Model in image is 5’10”, wearing a size small
Materials
6.0 mm crochet hook
5.0 mm crochet hook
Bossa nova yarn - 3 skeins of green and 5 skeins of cream
Scissors
Yarn needle
Blocking mat and pins
Special Abbreviations
BLO - back loop only
Dec - decrease
Fpdc - front post double crochet
Execution
Sleeve Instructions - make 2
Ch 50 (54, 58, 62)
Row 1: 1 dc in the 3rd ch from the hook and in each st across. Ch 3, turn.
Row 2-10: 1 dc in the BLO of each st across. Ch 3, turn.
Row 11: In BLO, 1 dc in the first st. 1 dc dec over the next two sts, 1 dc in each st across to the last 3 sts, 1 dc dec over the next two sts, 1 dc in the last st. Ch 3, turn.
Row 12-20: In BLO, 1 dc in each st across. Ch 3, turn.
Row 21: In BLO, 1 dc in the first st. 1 dc dec over the next two sts, 1 dc in each st across to the last 3 sts, 1 dc dec over the next two sts, 1 dc in the last st. Ch 3, turn.
Row 22-29: In BLO, 1 dc in each st across. Ch 3, turn.
Row 30: In BLO, 1 dc in the first st. 1 dc dec over the next two sts, 1 dc in each st across to the last 3 sts, 1 dc dec over the next two sts, 1 dc in the last st. Ch 3, turn.
Row 31-34: In BLO, 1 dc in each st across. Ch 3, turn.
Front Panel Instructions
Ch 70 (70, 76, 82)
Row 1: 1 dc in the 4th ch from the hook and in each ch across. Ch 3, turn.
Row 2-4: 1 dc in each st across. Ch 3, turn.
Row 5: 1 fpdc around the next st and in each st across. Ch 3, turn.
Row 6: 1 dc in each st across. Place the last dc in the top of the turning ch. Ch 3, turn.
Row 7-8: 1 dc in each st across. Ch 3, turn.
Row 9: 1 fpdc around the next st and in each st across. Ch 3, turn.
Row 10: 1 dc in each st across. Place the last dc in the top of the turning ch. Ch 3, turn.
Row 11-12: 1 dc in each st across. Ch 3, turn.
Row 13: 1 fpdc dec around the next two sts, fpdc around each st across. Ch 3, turn.
Row 14: 1 dc in each st until you have one st left, dc dec over the last st and into the top of the turning ch.
Row 15: Dc dec over the first two sts, 1 dc in each st across. Ch 3, turn.
Row 16: 1 dc in each st across to the last 2 sts. Dc dec over the last two sts. Ch 3, turn.
Row 17: 1 fpdc dec over the next two sts, fpdc in each st across. Ch 3, turn.
Row 18: 1 dc in each st across to the last 2 sts. Dc dec over the last two sts. Ch 3, turn.
Row 19: Dc dec over the first two sts, 1 dc in each st across. Ch 3, turn.
Row 20: 1 dc in each st across to the last 2 sts. Dc dec over the last two sts. Ch 3, turn.
Depending on your size, you will repeat rows 21-25 as follows: size small - just go through 21-25 and then move on, size medium - you will make 21-25 twice, size large - you will make 21-25 three times, size extra large - you will make 21-25 4 times.
Then move on to “Row 1”, which is what I labeled the rest of the sweater to avoid confusion.
Row 21: 1 fpdc in the next st and in each st across. Ch 3, turn.
Row 22: 1 dc in each st until you have one st left, dc dec over the last st and into the top of the turning ch.
Row 23-24: 1 dc in each st across. Ch 3, turn.
Row 25: 1 fpdc in the next st and in each st across. Ch 3, turn.
Row 1: 1 dc in each st across, place 2 dc in the top of the turning ch. Ch 3, turn.
Row 2: 2 dc in the first st, 1 dc in each st across. Ch 3, turn.
Row 3: 1 dc in each st across until you have 1 st remaining, 2 dc in the last st. Ch 3, turn.
Row 4: 2 fpdc around the next st, 1 fpdc around each st across. Ch 3, turn.
Row 5: 1 dc in each st across, place 2 dc in the top of the turning ch. Ch 3, turn.
Row 6: 2 dc in the first st, 1 dc in each st across. Ch 3, turn.
Row 7: 1 dc in each st across until you have 1 st remaining, 2 dc in the last st. Ch 3, turn.
Row 8: 2 fpdc around the next st, 1 fpdc around each st across. Ch 3, turn.
Row 9: 1 dc in each st across. Place the last dc in the top of the turning ch. Ch 3, turn.
Row 10-11: 1 dc in each st across. Ch 3, turn.
Row 12: 1 FPdc in the next st and in each st across. Ch 3, turn.
Row 13: 1 dc in each st across. Place the last dc in the top of the turning ch. Ch 3, turn.
Row 14-15: 1 dc in each st across. Ch 3, turn.
Row 16: 1 fpdc around the next st and around each st across. Ch 3, turn.
Row 17: 1 dc in each st across. Place the last dc in the top of the turning ch. Ch 3, turn.
Row 18-19: 1 dc in each st across. Ch 3, turn.
Back Panel Instructions
Ch 70 (70, 76, 82)
Row 1: 1 dc in the 4th ch from the hook and in each ch across. Ch 3, turn.
Row 2-4: 1 dc in each st across. Ch 3, turn.
Row 5: 1 fpdc around the next st and in each st across. Ch 3, turn.
Row 6: 1 dc in each st across. Place the last dc in the top of the turning ch. Ch 3, turn.
Row 7-8: 1 dc in each st across. Ch 3, turn.
Repeat Rows 5-8 until you have the same amount of rows you have on the front panel.
Blocking and Assembly
Once your panels and sleeves are complete, block them to size.
Once dry, fold your sleeves in half lengthwise and sew up the seams.
Lay your front panel on top of your back panel and sew the tops of the shoulders together.
Attach your sleeves to where you want them on each side of the garment and sew in place (do this inside out). Then sew up the seam on each side of the panels to where your sleeve begins.
Turn right side out.
Bottom Cuff Instructions
Using your 5.00 mm crochet hook, attach your cuff color in any st along the bottom
Ch 8
Row 1: 1 sc in the 2nd ch from the hook and in the next 6 sts. Sl st into the next st on the bottom of the panel, another sl st into the next st, ch 1, turn.
Row 2: 1 sc in the next 7 sc you made previously. Ch 1, turn.
Row 3: 1 sc in each st back down towards the panel (7 sc). Sl st into the next st on the panel, and another sl st into the next st, ch 1, turn.
Repeat Row 2 and 3 all the way around. Once you reach where you began, cut a long tail and sew the edges of the cuff together.
Neckline Border Instructions
Attach yarn in any st and do two rows of sc around the neckline.
Stripe Detailing
Cut a long piece of yarn in color of choice and thread through your yarn needle. Insert your yarn needle in the bottom stitch of the first “stripe” on the front of the sweater. Pull through and then insert your needle into the next stitch up. Continue doing this for each st until you have reached the top.
Add your christmas tree with yarn needle and yarn. I just made some lines but feel free to get creative with it.
Crochet Pattern by Hands of Zeal
Disclaimer: measurements are approximate due to differences between centimeters and inches, needle sizes and tension. All care has been taken to allow accurate completion of the pattern.
See more about...