Search Results
Results found for empty search
- Cozy Wool Lap Blanket
12/06/2024 Level of difficulty Measurements: 45” x 36.5” Materials: 18 skeins Merino Supreme - Color 5007/Juniper 9.00mm crochet hook Scissors Yarn needle Abbreviations: Ch - chain Sk - skip St - stitch Dc - double crochet Fpdc - front post double crochet Bpdc - back post double crochet *If you would like to make a bigger blanket, make a foundation ch with a multiple of 8 + 4 Pattern Instructions: Ch 100 Row 1: Sk 3 chs (count as 1 dc), 1 dc into the next ch and in each ch across. Turn. Row 2: Ch 2 (count as 1 dc), sk 1st st, *1 fpdc around each of the next 4 sts, 1 bpdc around each of the next 4 sts,* repeat from * across ending with 1 dc into the top of the turning ch. Row 3-5: Repeat Row 2 Row 6: Ch 2 (count as 1 dc), sk 1st st, *1 bpdc around each of the next 4 sts, 1 fpdc around each of the next 4 sts,* repeat from * across ending with 1 dc into the top of the turning ch. Row 7-10: Repeat Row 6 Repeat Rows 2-10 five more times or until desired length. Do not finish off. Move on to the border. Border Round 1: Ch 2, hdc evenly around the entire blanket, placing 3 hdc in each corner. Join with a sl st in the first hdc. Round 2: Ch 2, 1 hdc in each st around, placing 3 hdc in each corner (2nd hdc of the 3 hdc you made in the previous round). Join with a sl st to the first hdc. Round 3: *Ch 3, sl st in the first ch of the ch 3 you just made (picot made), sk one st, sl st in the next st,* repeat from * all the way around. Finish off, weave in ends.. Crochet Pattern by Hands of Zeal Disclaimer: Measurements are approximate due to differences between centimeters and inches, needle sizes and tension. All care has been taken to allow accurate completion of the pattern. See more about...
- Jolly Christmas Pillow
11/29/2024 Level of difficulty Size: 18” x 18” Materials: 1 Natural Cotton Maxcolor Sparkle yarn roll– Colors: 8001 (White), 3501 (Chili Pepper) & 5767 (Brazilian Green) 1 Natural Cotton Maxcolor 4/6 (14 oz) yarn roll – Color: 8001 (White) 1 Encanto yarn roll – Color: 1013 (Golden Grass) Círculo Crochet Hook 3.5 mm Tapestry needle Gauge: Each motif from Chart 1, made with Natural Cotton Maxcolor Sparkle yarn and a 3.5 mm hook, measures 3.15 x 3.15 inches. Stitch Glossary & Abbreviations: st. (Stitch), sts. (Stitches), ch. (Chain), sl st. (Slip Stitch), rnd/r. (Round/Row), sc. (Single Crochet), dc. (Double Crochet), Magic Ring. Instructions: Chart 1 With the Chilli Pepper yarn, start with a magic ring. 1- Start with 3 ch., 2 dc., 2 ch., 3 dc., 2 ch. , repeat from to 2x more. Close with sl st. Fasten off the yarn. 2- Join the White (Sparkle) yarn, start the rnd. with: 3 ch., 2 dc., 2 ch., 3 dc. in the same base space. Skip 3 base sts., and work: in the 2 base ch.: 3 dc., 2 ch., 3 dc., skip 3 base st. , repeat from to 2x more. Close with 1 sl st. Fasten off the yarn. Continue following chart 1, making the appropriate color changes. Fasten off the yarns. Make 4 identical motifs and, using a tapestry needle, join them with hand stitching, following the assembly diagram. Chart 2 Attach the white yarn to one of the corners. 1- In the corner, start with 3ch., 2 dc., 2 ch., and 3 dc. in the same base space., work the lateral skipping 3 base sts., 3 dc. between the 2 base block. In the corner, work: 3 dc., 2 ch. and 3 dc. in the same base space , repeat from to all the way arounf the round. Close with sl st. Continue following chart 2, working in circular rounds, making the appropriate color changes. Fasten off. Chart 3 – Back Part 1 Attach the white yarn to one of the corners. 1- Start with 5 ch., skip 2 base sts., 1 dc. in the 2nd dc. of the base block, 2 ch., skip 3 base sts. , repeat from to until the end of row. Finish with 1 dc. 2 to 21- Start with 5 ch., skip 2 base sts., 1 dc. , repeat from to until the end of row. Fasten off. Chart 4 – Back Part 2 With the White yarn, start with 71 ch. 1- Start in the 8th ch. from the hook, work: 1 dc., 2 ch., skip 2 base sts. , repeat from to until the end of row. Finish with 1 dc. 2 to 12- Start with 5 ch., skip 2 base sts., 1 dc. , repeat from to until the end of row. Fasten off. Chart 5 – Finishing & Joining Position the two pieces, overlapping one over the other, on the back side of the front part of the pillow.Join the White yarn in one of the corners, working around the entire edge of the piece to join the front part with the two back pieces. 1- In the corner, make 4 sc. in the same base space, on the side, work 1 sc. for each base st. , repeat from to , working around the entire piece, joining the front to the back part. Close with 1 sl st. Fasten off. Cord: Make 30 ch., secure with 1 sc. on one side of the opening, and make 30 more ch. Fasten off the yarn. Work 3 cords on the back, on one side of the opening, leaving a space of 6 "squares" between each cord. Designer: Heloisa Mazoni Disclaimer: Measurements are approximate due to differences between centimeters and inches, needle sizes and tension. All care has been taken to allow accurate completion of the pattern. See more about...
- Christmas Charm Carpet
11/29/2024 Level of difficulty Approximate size: 24” x 15.75” Materials: 1 Náutico Slim yarn roll – Color: 8001 (White) 1 Náutico Poly yarn roll – Colors: 5767 (Brazilian Green) & 3402 (Círculo Red) Crochet Hook – 6.0 mm Gauge: A 4-inch square, made in sc. using Náutico Poly yarn and a 6.0 mm hook, measures 10 sts. x 11 rows. Stitch Glossary & Abbreviations: st. (Stitch), sts. (Stitches), ch. (Chain), sl st. (Slip Stitch), rnd/r. (Round/Row); sc. (Single Crochet), BL sc (Back Loop Single Crochet). Instructions: Start with the Círculo Red yarn, make 57 ch. + 1 ch. to turn the work. 1- Start in the 2nd ch. from the hook, work: 57 sc. 2 to 4- Rem. o fio.Start with 1 ch., 57 BL sc. Continue following the chart, working in back-and-forth rows, making the appropriate color changes. Fasten off the yarn. Designer: Heloisa Mazoni Disclaimer: Measurements are approximate due to differences between centimeters and inches, needle sizes and tension. All care has been taken to allow accurate completion of the pattern. See more about...
- Holiday Light Placemat Set
11/29/2024 Level of difficulty Size: 17.7” in diameter Materials: 1 Natural Cotton Maxcolor 4/6 (7 oz) yarn roll – Color: 8001 (White) 1 Natural Cotton Maxcolor Sparkle yarn roll – Color: 5767 (Brazilian Green) & 3501 (Chilli Pepper) Círculo Crochet Hook - 3.5 mm Gauge: A 4-inch square in fantasy st., made with Natural Cotton Maxcolor 4/6 and a 3.5 mm hook = 15 sts. x 7 rows. Stitch Glossary & Abbreviations: st. (Stitch), sts. (Stitches), ch. (Chain), sl st. (Slip Stitch), rnd/r. (Round/Row); sc. (Single Crochet), dc. (Double Crochet), Set of Puff st. (Set of 5 Puff Stitches with 4 loops each closed together), Bp tr (Back Post Treble Crochet), Magic Ring. Instructions: With the White yarn, start with a magic ring, 1- Start with 3 ch., 11 dc. Close with sl st. Set the yarn aside. 2- Join the Chilli Pepper yarn, work with 1 sl st. for each base st. Fasten off the yarn. 3- Continue with the White yarn reserved from the 1st rnd., and work leaving the sl sts. from the previous rnd. at the front of the piece: start with 3ch., 1 dc. in the same base st., 2 dc. in the same base st. , repeat from to until the end of round. Close with sl st. 4- Start with 3 ch., 2 dc. in the same base st., 1 dc., 2 dc. in the same base st. , repeat from to until the end of round. Close with sl st. Set the yarn aside. 5- Join the Chilli Pepper yarn, work with 1 sl st. for each base st. Fasten off the yarn. Continue following the chart, working in circular rnd., making the appropriate color changes. Fasten off the yarns. Make 2 identical pieces. Designer: Heloisa Mazoni Disclaimer: Measurements are approximate due to differences between centimeters and inches, needle sizes and tension. All care has been taken to allow accurate completion of the pattern. See more about...
- Santa Claus Napkin Ring
11/28/2024 Level of difficulty Approximate size: 2.4 inches tall. Materials: 1 Amigurumi yarn ball– Colors: #3528 (Carmine) & #8990 (Black); 1 Amigurumi Pelúcia yarn ball – Color: #8001 (White); Encanto Slim – Color: 7577 (Gold); Crochet hook – 3.0 mm & 2.0 mm; Tapestry needle; Locking stitch marker. Stitch Glossary: Chain = ch.; Single Crochet = sc. Instructions: Start with Amigurumi yarn #3528 (Carmine) and 3.0 mm hook Make 30 ch., and close in a circle in the 1st ch. with 1 sc. 1 to 5 (5 rounds): 30 sc. Change to Amigurumi yarn #8990 (Black) and 3.0 mm hook 6 & 7- 30 sc. Change to Amigurumi yarn #3528 (Carmine) and 3.0 mm hook 8 to12 (5 rounds)- 30 sc. Change to Amigurumi Pelúcia yarn #8001 (White) and 3.0 mm hook 13 & 14- 30 sc. Fasten off. Join the Amigurumi Pelúcia yarn #8001 (White) on the other side of the foundation ch. and make 2 rnd. of 30 sc. each. Belt With the Encanto Slim yarn #7577 (Gold) and 2.0 mm hook Make a cord with 30 ch. Fasten off, leaving a yarn tail for sewing. Sew it over the belt, forming a rectangle over 2 sts. and 3 rnd. Created by: Kelly Stopassoli (@kellyamigurumi) Pattern review by: Patty Wolf Disclaimer: Measurements are approximate due to differences between centimeters and inches, needle sizes and tension. All care has been taken to allow accurate completion of the pattern. See more about...
- Christmas Tree Basket
11/28/2024 Level of difficulty Size: 5.1” tall x 4.9” in diameter Materials: 1 Premium T-Shirt yarn roll – Colors: 5767 (Brazilian Green) & 3528 (Carmine) 1 Encanto yarn roll – Color: 7326 (Old Gold) Crochet hook – 8.0 mm Stitch Glossary & Abbreviations: st. (Stitch), sts. (Stitches), rnd. (Round), ch. (Chain), sl st. (Slip Stitch), sc. (Single Crochet), Wc st. (Waistcoat Stitch), inc. (increase of 2 waistcoat stitches in the same base stitch), Magic Ring, Invisible Round Closure (Slip the loop off the hook, insert it into the first stitch of the round, pull the loop through, and remove it from the hook, setting it aside for the next step. Insert the hook into the middle of the stitch formed, yarn over, and pull it to the front. Insert the hook into the reserved loop, yarn over, and pull through both loops at once.) Instructions: Chart 1 - Bottom With the Brazilian Green yarn, start with a magic ring. Work in circular rnd., closing each rnd. with an invisible round closure. 1- 8 wc st. inside the magic ring 2- 8 inc. (16) 3- (1 wc st.., 1 inc.) x8 (24) 4- (2 wc st., 1 inc.) x8 (32) 5- 32 wc st. 6- Work on the wrong side of the piece: 32 sl st. Set the yarn aside. Chart 2 - Side The lateral of the basket uses the tapestry crochet technique. In this technique, work with 2 or more yarns in the same round, changing colors as indicated by the chart. To change colors, finish the last 2 loops on the hook with the new color, and hide the unused yarn over the previous round, weaving it between the stitches of the new color. Continue with the Brazilian Green yarn from chart 1. Work in circular rnd., closing each rnd. with an invisible round closure. 1- Work in the sl st. of the last rnd. of the bottom: 32 wc st. 2- Join the Carmine and Old Gold yarns (work with double yarn, using the 2 yarns together), extend them over the base round. With the Brazilian Green yarn, work 9 wc st., change to the Carmine and Old Gold yarns, 1 wc st., change to the Brazilian Green yarn, 22 wc st.Continue following chart 2, working in circular rounds, making the appropriate color changes.Fasten off the yarns, but reserve the Brazilian Green yarn from the last color change. Chart 3 – Finishing Continue with the Brazilian Green yarn from chart 2. 1- 32 sl st. Fasten off. Designer: Rosana Recchia Disclaimer: Measurements are approximate due to differences between centimeters and inches, needle sizes and tension. All care has been taken to allow accurate completion of the pattern. See more about...
- Santa's Treasures
11/28/2024 Level of difficulty Size: 5.5 inches wide x 4.7 inches tall Materials: 1 Premium T-Shirt yarn roll – Colors: 8001 (White), 3528 (Carmine) and 3363 (Rose) Premium T-Shirt yarn scraps – Color: 8243 (Grey Resin) Crochet hook – 8.0 mm Stitch Glossary & Abbreviations: st. (Stitch), sts. (Stitches), ch. (Chain), sl st. (Slip Stitch), rnd. (Round), sc. (Single Crochet), Wc st. (Waistcoat Stitch), incT. (triple increase, 3 waistcoat stitches in the same base stitch), Magic Ring, dc. (Double Crochet), dctog. (Double Crochet closed together), Magic Ring, Invisible Round Closure (Slip the loop off the hook, insert it into the first stitch of the round, pull the loop through, and remove it from the hook, setting it aside for the next step. Insert the hook into the middle of the stitch formed, yarn over, and pull it to the front. Insert the hook into the reserved loop, yarn over, and pull through both loops at once.). Instructions: Chart 1 - Bottom With the Carmine yarn, start with a magic ring. Work in circular rounds, closing each round with an invisible round closure. 1- 8 sc. inside of magic ring 2- (1 wc st., 1 incT.) x4 (16) 3- 2 wc st. (1 incT., 3 wc st) x3, 1 incT. 1 wc st. (24) Continue following chart 1, working in rounds and closing all the rnd. with an invisible closure until you reach the 6th rnd. 7- On the wrong side of the piece, work 1 sl st. for each base st. Fasten off. Set the yarn aside. Chart 2 – Lateral The lateral of the basket uses the tapestry crochet technique. In this technique, work with 2 or more yarns in the same round, changing colors as indicated by the chart. To change colors, finish the last 2 loops on the hook with the new color, and hide the unused yarn over the previous round, weaving it between the stitches of the new color. Join the White yarn. 1- Work taking the sl st. from the last round: 48 wc st. 2- 48 wc st. 3- Join the Rose yarn and extend it over the base round. With the White yarn, make 18 wc st., change to Rose yarn, 2 wc st., change to White yarn, 9 wc st., change to Rose yarn, 2 wc st., change to White yarn, 17 wc st. (48) Continue following chart 2, working in circular rounds, making the appropriate color changes. Fasten off all the yarns. Chart 3 – Hat Join the Carmim yarn on the right side of the basket, keeping Santa Claus's face at the front. 1- 13 sc. 2- 1 sl st., 11 sc. 3- 1 sl st., 9 sc. Continue following chart 3, working in back-and-forth rows, making the appropriate color changes. Embroidery: Embroider the eyes with the Grey Resin yarn, and the nose with the Rose yarn. For the mouth detail, cut the Carmine yarn in half, following the drawing in chart 2. Chart 4 Join the Carmine yarn at the top part of the basket. 1- Work 1 sl st. for each base st., working all the way around the top of the basket. Fasten off the yarn. Designer: Rosana Recchia Disclaimer: Measurements are approximate due to differences between centimeters and inches, needle sizes and tension. All care has been taken to allow accurate completion of the pattern. See more about...
- Gingerbread House
11/28/2023 Level of difficulty Approx. size: 5” height x 3.5” width x 3” deep Material Circulo Yarns - Amigurumi - 1 ball in each color #7569 brownie #3528 carmine #7030 mustard #5398 moss, and #7564 porcelain Amigurumi Sparkle - 1 ball in each color #8001 white and #3528 carmine Amigurumi Pelucia - 1 ball #8001 white Maxi Mouline - 1 skein in each color #854 brown #155 mustard #744 moss and #235 red Crochet hook B Fabric glue 2 magnetic snap clasps 14mm White sewing thread to sew claps 1 mini heart shaped button 6mm Stitch markers, pins Tapestry needle and scissors Created by: LovLoops Disclaimer: Measurements are approximate due to differences between centimeters and inches, needle sizes and tension. All care has been taken to allow accurate completion of the pattern. See more about...
- Santa Claus
11/29/2024 Level of difficulty Approximate size: Reindeer: 3.9” Santa Claus: 8.6” Materials: 1 Amigurumi yarn ball - Colors: #3061 (Gardenia), #7713 (Firewood), #7078 (Rose Pepper), #7400 (Chocolate Cake), #5083 (Echo), #8001 (White); 1 Amigurumi Sparkle yarn ball - Color: #8121 (Snowflake);Cléa or Rubi yarn – Color: Black; Encanto Slim yarn – Color: #7577 (Gold); Crochet hook – 2.0 mm & 2.5 mm; Safety eyes (10 mm) – Black; Tapestry needle;Polyester stuffing;Chopstick for neck support; Crepe tape; Acetate for the sole; Locking stitch marker. Stitch Glossary & Abbreviations: Increase = inc.; Triple Increase = incT.; Chain = ch.; Decrease = dec.; Half Double Crochet = hdc.; Double Crochet = dc.; Slip Stitch = sl st.; Single Crochet = sc.; Popcorn Stitch (4 dc. closed together in the same base stitch) = pop. st.; Back Loops Only = BLO.; Front Loops Only = FLO.; Place Marker = pm.; End of Round = eor. Invisible Fasten Off = Cut the yarn, pull the loop on the hook, thread it onto a tapestry needle, pass it through both loops of the 2nd stitch in the previous round, then pass the needle between the loops of the last complete stitch in the final row, bringing the yarn to the back of the work. Tie a knot and trim the excess yarn. Instructions: Head With Amigurumi yarn #3061 (Gardenia) and 2.0 mm hook 1- 6 sc. inside of a magic ring; 2- 6 inc. = 12 sc. Note: pm. on first sc.; 3- 1 sc., 1 inc. to eor = 18 sc.; 4- 2 sc., 1 inc. to eor = 24 sc.; 5- 3 sc., 1 inc. to eor = 30 sc.; 6- 4 sc., 1 inc. to eor = 36 sc.; 7- 5 sc., 1 inc. to eor = 42 sc.; 8- 6 sc., 1 inc. to eor = 48 sc.; 9 to 16 (8 rounds)- 48 sc; 17- 14 sc., 3 dec., 8 sc., 3 dec., 14 sc. = 42 sc.; 18- 15 sc., 1 ch., skip 1 base st., 10 sc., 1 ch., skip 1 base st., 15 sc. = 42 sc.; 19- 14 sc., 3 inc., 8 sc., 3 inc., 14 sc. = 48 sc.; 20- 14 sc., (1 sc., 1 inc.) 3x, 8 sc., (1 sc., 1 inc.) 3x, 14 sc. = 54 sc.; 21- 54 sc.; 22- 14 sc., (1 sc., 1 dec.) 3x, 8 sc., (1 sc., 1 dec.) 3x, 14 sc. = 48 sc.; 23- 14 sc., 3 dec., 8 sc., 3 dec., 14 sc. = 42 sc.; Place the safety eyes on rnd. 18, where we made the chains. 24- 5 sc., 1 dec. to eor = 36 sc.; 25- 4 sc., 1 dec. to eor = 30 sc.; 26- 3 sc., 1 dec. to eor = 24 sc.; 27- 2 sc., 1 dec. to eor = 18 sc.; 28- BLO: 18 sc.; 29 & 30- 18 sc. Fasten off. Turn the last 2 rnd. inside the head. Stuff the piece. With the Amigurumi yarn #3061 (Gardenia), embroider the eyelid above the eyes, passing the yarn three times. Nose With Amigurumi yarn #3061 (Gardenia) and 2.0 mm hook Go up 3 ch., skip the 1st one. 1- 1 sc., 4 sc. together in the last ch., on the other side of the foudation ch.: 1 sc., 1 inc. = 9 sc.; 2 & 3- 9 sc. Fasten off, leaving a yarn tail for sewing. Center the nose between rnd. 19 and 20 and sew.There's no need to add fiberfill. Shoes & Legs (2) With Amigurumi yarn #7400 (Chocolate Cake) and 2.0 mm hook Go up 5 ch., skip the 1st one. 1- 3 sc., 4 sc. together in the last ch. , on the other side of the foudation ch. : 2 sc., 2 inc. = 13 sc.; 2- 2 sc., 3 inc., 3 sc., 3 inc., 2 sc. = 19 sc.; 3- 4 sc., 4 inc., 4 sc., 5 inc., 2 sc. = 28 sc.; 4- 28 sc. At this point we take the measurement to make the sole template for cutting the acetate. Glue it to the inside of the sole before starting the decreases. 5- BLO: 28 sc. 6 to 8 (3 rounds)- 28 sc.; 9- 4 sc., 6 dec., 12 sc. = 22 sc.; 10- 2 sc., 5 dec., 10 sc. = 17 sc.; 11- BLO: 17 sc. Stuff a little. Change to Amigurumi yarn #7078 (Rose Pepper) 12 to 15 (4 rounds)- 17 sc. Make an invisible fasten off on the first leg. Make the second leg, and don’t cut the yarn. Make the shoe detail: join the Amigurumi Sparkle yarn #8121 (Snowflake) on the back of the foot, in the loops left over from rnd 11. 1- (1 sc., 1 inc.) 8x, 1 sc. = 25 sc.; 2 & 3- 25 sc. Fasten off. Stuff the legs. Return to the body and join the legs in the next round.On the second leg, make 4 ch.ATTENTION: From this point on, you will work with the back of the body facing you so that Santa Claus's belly is positioned correctly. In other words, you will make the 4 chains on the second leg, but before continuing, turn your piece so the back is facing you, then proceed with the work. 16- Join with 1 sc. in the 1st leg, make another 16 sc. in the 1st leg, 4 ch. in the ch. 17 sc. in the 2nd leg, 4 sc. on the other side of the ch. = 42 sc.; 17- 13 sc., 12 inc., 17 sc. = 54 sc.; 18 to 20 (3 rounds)- 54 sc.; 21 & 22- 13 sc., 24 sl st., 17 sc. = 54 stitches; 23- 7 sc., 1 dec. to eor = 48 sc.; 24- 48 sc.; 25- 6 sc., 1 dec. to eor = 42 sc.; 26- BLO: 42 sc. Stuff the legs. 27- 5 sc., 1 dec. to eor = 36 sc.; 28- 36 sc.; 29- 4 sc., 1 dec. to eor = 30 sc.; 30 & 31- 30 sc.; 32- 3 sc., 1 dec. to eor = 24 sc.; 33- 24 sc.; 34- 2 sc., 1 dec. to eor = 18 sc. 35- 1 sc., 1 dec. to eor = 12 sc.; 36 to 45 (10 rounds)- 12 sc. Cut two chopsticks of 4.7” each. Tape them together tightly using crepe tape, wrapping it around several times. Insert them into the center of the body and stuff it, packing it firmly until the body is solid and the chopstick support is completely hidden. Fasten off with a reverse magic ring. In the loops left over from rnd. 26, attach the Amigurumi Sparkle yarn #8121 (Snowflake) and work 2 rnd. of sc., to create the shirt detail of Santa Claus. Make an invisible fasten off. Left Arm With Amigurumi yarn #3061 (Gardenia) and 2.0 mm hook 1- 6 sc. inside of a magic ring; 2- 1 sc., 1 inc. to eor = 9 sc. Note: pm. on first sc.; 3- 9 sc.; 4- 1 popcorn st., 8 sc. = 9 stitches; 5- 1 dec., 7 sc. = 8 sc.; 6- BLO: 8 sc. Change to Amigurumi yarn #7078 (Rose Pepper) 7 to 16 (10 rounds)- 8 sc.; 17- Go up 1 chain and make 4 sc. for the left arm attachment. Fasten off, leaving a yarn tail for sewing.It ’s not necessary to add stuffing. Right Arm With Amigurumi yarn #3061 (Gardenia) and 2.0 mm hook 1- 6 sc. inside of a magic ring; 2- 1 sc., 1 inc. to eor = 9 sc. Note: pm. on first sc.; 3- 9 sc.; 4- 1 popcorn st., 8 sc. = 9 stitches; 5- 1 dec., 7 sc. = 8 sc.; 6- BLO: 8 sc. Change to Amigurumi yarn #7078 (Rose Pepper) 7 to 15 (9 rounds)- 8 sc.; 16- 4 sc. (TURN), go up 1 ch., 3 sc. for the right arm attachment. Fasten off, leaving a yarn tail for sewing.It ’s not necessary to add stuffing. Sleeve Detail With Amigurumi Sparkle yarn #8121 (Snowflake) and 2.0 mm hook In the loops left over from rnd. 6, work 2 rnd. of 8 sc. each. Fasten off. Beard With Amigurumi yarn #8001 (White) and 2.0 mm hook 1- 4 sc. inside of a magic ring; 2- 4 inc. = 8 sc. Note: pm. on first sc.; 3- 8 sc.; 4- 4 sl st., 4 inc. of sc. = 12 stitches; 5- 4 sl st., 8 sc. = 12 stitches 6- 12 sc.; 7- 4 sc., 8 sl st. = 12 stitches; 8- 1 sc., 1 inc. to eor = 18 sc.; 9- 18 sc.; 10- 5 sc., 1 inc. to eor = 21 sc.; 11- 6 sc., 1 inc. to eor = 24 sc.; 12- 3 sc., 1 inc. to eor = 30 sc.; 13- 4 sc., 1 inc. to eor = 36 sc. It’s not necessary to add stuffing. Close the beard using a tapestry needle. Moustache (2 sides) With Amigurumi yarn #8001 (White) and 2.0 mm hook 1- 4 sc. inside of a magic ring; 2- 4 inc. = 8 sc. Note: pm. on first sc.; 3- 8 sc.; 4- 4 sl st., 4 inc. of sc = 12 stitches; 5- 4 sl st., (1 sc., 1 inc. of sc.) 4x = 16 stitches; 6 & 7- 4 sl st., 12 sc. = 16 stitches; 8-(1 dec of sc., 1 sl st.) 4x, 4 sl st. = 12 stitches; 9- 4 sl st., (1 dec. of sc., 1 sl st.) 2x, 2 sc. = 10 stitches; 10 & 11- 10 sc.; 12- 5 dec. = 5 sc. Do the other side the same way. Fasten off with a reverse magic ring.It ’s not necessary to add stuffing. Hair With Amigurumi yarn #8001 (White) and 2.0 mm hook 1- 8 sc. inside of a magic ring; 2- 8 inc. = 16 sc. Note: pm. on first sc. Make the bangs: 6 strands with 7 ch., skip 2 ch., and return making 5 hdc., close with 1 sl st. in the next base stitch.Next , make the rest of the hair: 10 strands with 20 ch., skip 2 ch., and return making 18 hdc., close with 1 sl st. in the next base stitch.Fasten off. Hat Start with Amigurumi yarn #5083 (Echo) and 2.0 mm hook 1- 6 sc. inside of a magic ring; 2- 6 inc. = 12 sc. Note: pm. on first sc. Change to Amigurumi yarn #7078 (Rose Pepper) 3- BLO: 12 sl st.; 4- BLO: 1 sc., 1 inc. to eor = 18 sc. Change to Amigurumi yarn #5083 (Echo) 5- BLO:18 sl st. 6- BLO: 2 sc., 1 inc. to eor = 24 sc.; 7- 24 sc. Change to Amigurumi yarn #7078 (Rose Pepper) 8- BLO: 24 sl st. 9- BLO: 3 sc., 1 inc. to eor = 30 sc.; 10- 30 sc. Change to Amigurumi yarn #5083 (Echo) 11- BLO: 30 sl st.; 12- BLO: 4 sc., 1 inc. to eor = 36 sc.; 13- 36 sc. Change to Amigurumi yarn #7078 (Rose Pepper) 14- BLO: 36 sl st.; 15- BLO: 5 sc., 1 inc. to eor = 42 sc.; 16-: 42 sc. Change to Amigurumi yarn #5083 (Echo) 17- BLO: 42 sl st.; 18- BLO: 6 sc., 1 inc. to eor = 48 sc.; 19- 48 sc. Change to Amigurumi yarn #7078 (Rose Pepper) 20- BLO: 48 sl st.; 21- BLO: 7 sc., 1 inc. to eor = 54 sc.; 22- 54 sc. Change to Amigurumi yarn #5083 (Echo) 23- BLO: 54 sl st.; 24- BLO: 8 sc., 1 inc. to eor = 60 sc.; 25- 60 sc. Change to Amigurumi yarn #7078 (Rose Pepper) 26- BLO: 60 sl st.; 27- BLO: 9 sc., 1 inc. to eor = 66 sc.; 28- 66 sc. Change to Amigurumi yarn #5083 (Echo) 29-: BLO: 66 sl st.; 30- BLO: 10 sc., 1 inc. to eor = 72 sc.; 31- 72 sc. Change to Amigurumi yarn #7078 (Rose Pepper) 32 & 33- BLO: 72 sl st.; 34-: 72 sc. Change to Amigurumi yarn #5083 (Echo) 35 & 36- BLO: 72 sl st.; 37- 72 sc. Fasten off.. Embroider, with fio Encanto Slim yarn # 7577 (Gold), every two rounds from bottom to top, picking up two stitches (one from the top and one from the bottom). Hat DetailWith Amigurumi Sparkle yarn #8121 (Snowflake) and 2.0 mm hook Work in the front loops, inserting the hook from the inside of the hat so that when you turn it, the stitches will be on the right side. 1- FLO: 72 sc.; 2 to 5 (4 rounds)- 72 sc. Fasten off. Eyebrows With Amigurumi yarn #8001 (White) and 2.0 mm hook Work 5 ch., skip the 1st one, 3 sc., 1 sl st. = 4 stitches. Fasten off and glue above the eyes. Ears (2) With Amigurumi yarn #3061 (Gardenia) and 2.0 mm hook Work in back-and-forth rounds. 1- 6 sc. inside of a magic ring; 2- 6 inc. = 12 sc. Note: pm. on first sc.; 3- 1 sc., 1 inc. to eor = 18 sc.; Fold the ear and sew it to create the curve of the ear.Position the ears on the head on the rnd. with the eyes, leaving a 5-stitch gap between them, and sew them in place. Santa Claus Assembly First, sew the arms. To do this, use the finishing yarn, sew the arm to the side of the body, approximately at rnd. 34 and 35, sewing stitch by stitch from the last rnd. of the arm to the body by hand. To attach the head to the body, use the head articulation joint technique. Cut a piece of yarn about 12” long using the Amigurumi yarn color #3061 (Gardenia). With a doll needle, pass the yarn through the neck, between rnd. 36 and 37, and then through the head, exiting at the top. Repeat the same process with the other end of the yarn. Tie the ends of the yarn that come out of the top of the head, making several knots to secure it firmly. Trim the excess yarn. Note: You don't need to hide it, as the hair will cover it. Position the hair and glue it onto the head.Tip: Position the bangs at the front of the head and a strand of hair in front of the ears. Sew or glue the beard, then the mustache, onto the head. Finally, glue the hat, centering it with the hair. Apply blush to the nose and cheeks (optional). Gift Bag With Amigurumi yarn #5083 (Echo) and 2.0 mm hook Work in back-and-forth rows. Work 31 ch., skip the 1st one. 1 to 18 (18 rows)- 30 sc. Fasten off. From the 2nd row on, embroider with Encanto Slim yarn #7577 (Gold), every two rows and then every two stitches, throughout the entire gift bag.Sew the bottom and the side.Stuff the piece. And in the 2nd row, pass the Encanto Slim yarn #7577 (Gold), to gather and close the gift bag. Reindeer's Head & Body With Amigurumi yarn #7713 (Firewood) and 2.0 mm hook 1- 6 sc. inside of a magic ring; 2- 6 inc. = 12 sc. Note: pm. on first sc.; 3- 1 sc., 1 inc. to eor = 18 sc.; 4 to 6 (3 rounds)- 18 sc.; 7- 1 sc., 1 dec. to eor = 12 sc.; 8 to 10 (3 rounds)- 12 sc.; 11- 12 inc. = 24 sc.; 12 to 14 (3 rounds)- 24 sc.; 15- 2 sc., 1 dec. to eor = 18 sc.; 16- 18 sc.; 17- 1 sc., 1 dec. to eor = 12 sc. Stuff the piece. 18- 12 sc.; 19- 6 dec. = 6 sc. Fasten off with a reverse magic ring. Reindeer's Ears (2) With Amigurumi yarn #7713 (Firewood) and 2.0 mm hook 1- 6 sc. inside of a magic ring; 2- 6 sc. Note: pm. on first sc.; 3- 1 sc., 1 inc. to eor = 9 sc.; 4- 9 cs.; 5- 1 sc., 1 dec. to eor = 6 sc. Fold in half and close the sides with 3 sc. Fasten off, leaving a yarn tail for sewing. Sew right next to the horns between rnd. 4 and 6, counting from the top of the head. Reindeer's Snout With Amigurumi yarn #7713 (Firewood) and 2.0 mm hook Work 4 ch., skip the 1st one. 1- 2 sc., 1 incT. in the last ch., on the other side of the foundation ch.: 1 sc., 2 inc. = 10 sc.; 2 & 3- 10 sc. Fasten off, leaving a yarn tail for sewing. Sew between rnd. 9 and 12 of the reindeer’s head.Stuff it before finishing sewing. Nose With Amigurumi yarn #7078 (Rose Pepper) and 2.0 mm hook 1- 6 sc. inside of a magic ring; Make an invisible fasten off. Glue at the center of the snout. Horns (2) With Amigurumi yarn #7400 (Chocolate Cake) and 2.0 mm hook Work 6 ch., skip the 1st one. 1- 5 sl st., on the other side of the foundation ch.: 2 sl st., 3 ch., 2 sl st., on top of the ch., attach in the next loop with 1 sl st., 2 sl st. = 10 stitches. Fasten off, leaving a yarn tail for sewing. Place on top of the head and sew between rounds 2 and 3. Reindeer’s ScarfStart with Amigurumi yarn #5083 (Echo) and 2.0 mm hook Make 26 ch., skip the 1st one. 1- 25 sl st. Change to Amigurumi yarn #7078 (Rose Pepper) 2- BLO: 25 sl st. Fasten off and glue it around the neck. Reindeer's Arms (2) With Amigurumi yarn #7713 (Firewood) and 2.0 mm hook 1- 6 sc. inside of a magic ring; 2 to 6 (5 rounds): 6 sc.; Fold in half and close the sides with 3 sc. Reindeer's Legs (2) With Amigurumi yarn #7713 (Firewood) and 2.0 mm hook 1- 6 sc. inside of a magic ring; 2- 1 sc., 1 inc. to eor = 9 sc. Note: pm. on first sc.; 3- 9 sc.; 4- 2 dec., 5 sc. = 7 sc.; 5 & 6- 7 sc.; 7- 3 dec., 1 sc. = 4 sc. Fasten off with a reverse magic ring. Sew the legs to the sides of the body between rounds 4 and 5 and the arms above the legs between rounds 7 and 8. Embroider the eyes and mouth detail with Cléa or Rubi Black thread. Created by: Karla Barbosa (@oficialkarlabarbosa) Pattern review by: Patty Wolf Disclaimer: Measurements are approximate due to differences between centimeters and inches, needle sizes and tension. All care has been taken to allow accurate completion of the pattern. See more about...
- Frozen Flake Band
11/28/2024 Level of difficulty Approximate size: 3.15” Materials: Headband; Styrofoam balls – 60 mm; 1 Amigurumi yarn ball - Colors: #8001 (White), #5398 (Moss), #4445 (Tangerine) & #3402 (Círculo Red); Amigurumi yarn scraps – Color: #8990 (Black); Crochet hook – 2.0 mm & 2.5 mm; Safety eyes (8 mm) – Black; Tapestry needle;Polyester stuffing; Locking stitch marker. Stitch Glossary & Abbreviations: Increase = inc.; Chain = ch.; Decrease = dec.; Slip Stitch = sl st.; Single Crochet = sc.; End of Round = eor; Place Marker = pm.; Back Loops Only = BLO. Instructions: Head With the Amigurumi yarn #8001 (White) and 2.5 mm hook 1- 6 sc. inside a magic ring; 2- 6 inc. = 12 sc. Note: pm. on first sc.; 3- 1 sc., 1 inc. to eor = 18 sc.; 4- 2 sc., 1 inc. to eor = 24 sc.; 5- 3 sc., 1 inc. to eor = 30 sc.; 6- 4 sc., 1 inc. to eor = 36 sc.; 7 to 15 (9 rounds): 36 sc. Place the safety eyes between rnd. 9 & 10, with 4 stitches between them. Place the styrofoam ball. 16- 4 sc., 1 dec. to eor = 30 sc.; 17- 3 sc., 1 dec. to eor = 24 sc.; 18- 2 sc., 1 dec. to eor = 18 sc. Stuff it. 19- 1 sc., 1 dec. to eor = 12 sc. 20- 3 dec. = 3 sc. (there are leftover stitches in the second-to-last rnd.) Fasten off with a reverse magic ring the leftover sts. from the second-to-last rnd. with the 3 sts. from the last rnd. Base to cover the headband With the Amigurumi yarn #8001 (White) and 2.5 mm hook 1- 6 sc. inside of a magic ring; Make approximately 80 rnd. of 6 sc. to cover the headband. Fasten off with a reverse magic ring. Sew the head to the top of the headband. Nose With the Amigurumi yarn #4445 (Tangerine) and 2.5 mm hook 1- 4 sc. inside of a magic ring; 2- 1 sc., 1 inc. to eor = 6 sc.; 3- 6 sc.; 4- 1 sc., 1 inc. to eor = 9 sc.; 5- 9 sc. Fasten off. Sew or glue between rounds 10 and 14 of the head. Embroider the eyebrows and the mouth with the Amigurumi yarn #8990 (Black). Ear Muffs (2) With the Amigurumi yarn #3402 (Círculo Red) and 2.5 mm hook 1- 6 sc. inside of a magic ring; 2- 6 inc. = 12 sc. Note: pm. on first sc.; 3- BLO: 12 sc. Fasten off. Make the second piece exactly the same, don’t cut the yarn. To connect the muffs, make 15 ch., attach to one of the sc. on the last round of the first piece and return by making sl sts. Scarf With the Amigurumi yarn #5398 (Moss) and 2.5 mm hook Go up 35 ch., skip the 1st one, and work 34 sc. Created by: Fabiana Gonçalves (@atelielinhaseagulhas) Pattern review by: Patty Wolf Disclaimer: Measurements are approximate due to differences between centimeters and inches, needle sizes and tension. All care has been taken to allow accurate completion of the pattern. See more about...
- Christmas Teddy Bear
11/27/2024 Level of difficulty Approximate size: 6.7” tall Materials: 1 Amigurumi Pelúcia yarn ball - Color: #8001 (White); 1 Amigurumi yarn ball - Color: #3528 (Carmine); 1 Amigurumi Sparkle yarn ball - Color: #5745 (Eucaliptus); Amigurumi Soft yarn scraps – Color: #8990 (Black); Crochet hook – 3.0 mm; Safety eyes (12 mm) – Brown; Safety nose (7 mm) – Black; Tapestry needle;Polyester stuffing; Locking stitch marker. Stitch Glossary & Abbreviations: Increase = inc.; Chain = ch.; Decrease = dec.; Half Double Crochet = hdc.; Double Crochet = dc.; Slip Stitch = sl st.; Single Crochet = sc.; End of Round = eor; Place Marker = pm.; Back Loops Only = BLO. Execution Body With the Amigurumi Pelúcia yarn #8001 (White) 1- 6 sc. inside of a magic ring; 2- 6 inc. = 12 sc. Note: pm. on first sc.; 3- 1 sc., 1 inc. to eor = 18 sc.; 4- 2 sc., 1 inc. to eor = 24 sc.; 5- 3 sc., 1 inc. to eor = 30 sc.; 6- 4 sc., 1 inc. to eor = 36 sc.; 7- 5 sc., 1 inc. to eor = 42 sc.; 8 & 9- 42 sc.; 10- 5 sc., 1 dec. to eor = 36 sc.; 11 to13 (3 rounds)- 36 sc.; 14- 4 sc., 1 dec. to eor = 30 sc.; 15 &16- 30 sc.; 17- 3 sc., 1 dec. to eor = 24 sc.; 18- 24 sc.; 19- 2 sc., 1 dec. to eor = 18 sc. Fasten off, leaving a yarn tail for sewing. Head With the Amigurumi Pelúcia yarn #8001 (White) 1- 6 sc. inside of a magic ring; 2- 6 inc. = 12 sc. Note: pm. on first sc.; 3- 1 sc., 1 inc. to eor = 18 sc.; 4- 2 sc., 1 inc. to eor = 24 sc.; 5- 3 sc., 1 inc. to eor = 30 sc.; 6- 4 sc., 1 inc. to eor = 36 sc.; 7- 5 sc., 1 inc. to eor = 42 sc.; 8 to 12 (5 rounds)- 42 sc.; 13- 5 sc., 1 dec. to eor = 36 sc.; Place the safety eyes between rnd. 12 & 13, with 8 visible stitches between them. 14- 36 sc.; 15- 4 sc., 1 dec. to eor = 30 sc.; 16- 3 sc., 1 dec. to eor = 24 sc.; 17- 2 sc., 1 dec. to eor = 18 sc. Stuff it. Fasten off. Sew the head onto the body. With the Amigurumi Soft yarn #8990 (Black), embroider the nose, mouth and eyebrows. Snout With the Amigurumi Pelúcia yarn #8001 (White) 1- 6 sc. inside of a magic ring; 2- 6 inc. = 12 sc. Note: pm. on first sc.; 3- 1 sc., 1 inc. to eor = 18 sc.; 4- 2 sc., 1 inc. to eor = 24 sc.; 5- 11 sc., 1 inc. to eor = 26 sc.; 6 & 7- 26 sc.; 8- 11 sc., 1 dec. to eor = 24 sc. Fasten off, leaving a yarn tail for sewing. Place the safety nose and embroider the details with the Amigurumi Soft yarn #8990 (Black) between rnd. 2 & 3. Sew onto the head. Stuff the piece before you finish sewing. Ears (2) With the Amigurumi Pelúcia yarn #8001 (White) 1- 6 sc. inside of a magic ring; 2- 6 inc. = 12 sc. Note: pm. on first sc.; 3- 1 sc., 1 inc. to eor = 18 sc.; 4- 18 sc.; 5- 1 sc., 1 dec. to eor = 12 cs. Fasten off, leaving a yarn tail for sewing.Sew onto the head. Legs (2) With the Amigurumi Pelúcia yarn #8001 (White) 1- 6 sc. inside of a magic ring; 2- 6 inc. = 12 sc. Note: pm. on first sc.; 3- 1 sc., 1 inc. to eor = 18 sc.; 4- 2 sc., 1 inc. to eor = 24 sc.; 5 & 6- 24 sc.; 7- 2 sc., 1 dec. to eor = 18 sc.; 8- 18 sc.; 9- 1 sc., 1 dec. to eor = 12 sc.; 10 to 12 (3 rounds): 12 sc.Fasten off, leaving a yarn tail for sewing. Add some stuffing halfway up.Sew onto the body. Arms (2) With the Amigurumi Pelúcia yarn #8001 (White) 1- 6 sc. inside of a magic ring; 2- 6 inc. = 12 sc. Note: pm. on first sc.; 3- 1 sc., 1 inc. to eor = 18 sc.; 4 to 6 (3 rounds)- 18 sc.; 7- 1 sc., 1 dec. to eor = 12 sc.; 8- 12 sc.; 9- 3 sc., 3 dec., 3 sc. = 9 sc.; 10 to 15 (6 rounds): 9 sc. Fasten off, leaving a yarn tail for sewing. Add some stuffing halfway up. Sew to the sides of the body at the neck height Sweater Start with Amigurumi Sparkle yarn #5745 (Eucaliptus) Go up 17 ch. 1- 27 inc. of dc. = 54 dc.; 2- 1 dc., 1 inc. of dc. to eor = 81 dc.; Let’s set the 4 markers to make the sleeves.Set aside 18 stitches for each sleeve and place the markers so that the back and front each have 22 stitches. 3- Make 12 dc., skip to the st. after the 2nd marker, make 22 dc., skip to the st. after the 4th marker, make 10 more dc., and close with a sl st. We will not work in spiral crochet; each round will be finished with a sl st., going up 1 ch. to add height before continuing with circular crochet. 4 to 6 (3 rounds)- 44 dc. Change to Amigurumi yarn #3528 (Carmine) 7- 44 dc. Fasten off. Sleeves (2) Start with the Amigurumi Sparkle yarn #5745 (Eucaliptus) 1- 18 dc. over the stitches you left reserved at the previous marked point. 2 to 4 (3 rounds)- 18 dc. Change to Amigurumi yarn #3528 (Carmine) 5- 18 dc. Fasten off. Turn the sweater inside out and sew the small hole under the arms. Scarf With the Amigurumi yarn #3528 (Carmine) Go up 70 ch., skip the 1st one. 1- 69 hdc.; 2- BLO: 69 hdc. Fasten off. Hat Start with the Amigurumi Sparkle yarn #5745 (Eucaliptus) 1- 6 sc. inside of a magic ring; 2- 1 sc., 1 inc. to eor = 9 sc. Note: pm. on first sc.; 3- 9 sc. Change to Amigurumi yarn #3528 (Carmine) 4- 2 sc., 1 inc. to eor = 12 sc.; 5- 12 sc.; 6- 2 sc., 1 inc. to eor = 16 sc. Change to Amigurumi Sparkle yarn #5745 (Eucaliptus) 7- 16 sc.; 8- 3 sc., 1 inc. to eor = 20 sc.; 9- 20 sc. Change to Amigurumi yarn #3528 (Carmine) 10- 4 sc., 1 inc. to eor = 24 sc.; 11- 24 sc.; 12- 3 sc., 1 inc. to eor = 30 sc. Change to Amigurumi Sparkle yarn #5745 (Eucaliptus) 13-30 sc.; 14- 4 sc., 1 inc. to eor = 36 sc.; 15- 36 sc. Change to Amigurumi yarn #3528 (Carmine) 16- 5 sc., 1inc. to eor = 42 sc.; 17- 42 sc.; 18- 6 sc., 1 inc. to eor = 48 sc. Change to Amigurumi Sparkle yarn #5745 (Eucaliptus) 19 to 21 (3 rounds)- 48 sc. Change to Amigurumi yarn #3528 (Carmine) 22 to 24 (3 rounds)- 48 sc. Change to Amigurumi Sparkle yarn #5745 (Eucaliptus) 25 to 27 (3 rounds)- 48 sc. Change to Amigurumi yarn #3528 (Carmine) 28 to 30 (3 rounds)- 48 sc. Change to Amigurumi Sparkle yarn #5745 (Eucaliptus) 30 to 33 (3 rounds)- 48 sc. Change to Amigurumi Pelúcia yarn #8001 (White) 34 to 37 (4 rounds)- 48 sc. Fasten off. Pom-pom With the Amigurumi Pelúcia yarn #8001 (White) 1- 6 sc. inside of a magic ring; 2- 6 inc. = 12 sc. Note: pm. on first sc.; 3- 1 sc., 1 inc. to eor = 18 sc.; 4- 2 sc., 1 inc. to eor = 24 sc.; 5- 24 sc.; 6- 2 sc., 1 dec. to eor = 18 sc. Stuff a little bit. 7- 1 sc., 1 dec. to eor = 12 sc.; 8- 6 dec. = 6 sc. Fasten off with a reverse magic ring. Created by: Paula de Tassia Ferreira (@crochedapaula1) Pattern review: Patty Wolf Disclaimer: Measurements are approximate due to differences between centimeters and inches, needle sizes and tension. All care has been taken to allow accurate completion of the pattern. See more about...
- Christmas Bell Tree Ornament
11/16/2024 Level of difficulty MATERIAL 1 skein of Amigurumi Sparkle Yarn - Color: 3528 (Carmine) or any color you prefer 2.75 mm / C-2 crochet hook Scissors Tapestry needle Liquid Silicone Glue Stitches and techniques used Chain (ch) Slip stitch (sl st) Single crochet (sc) Double crochet (dc) Half double crochet (hdc) Remember: Always use 3 ch as the first dc of each round, close every round with a sl st, and move to the next space with a sl st. Round 1: Start with a magic ring, chain 3 (counts as 1 dc), then work 1 dc, 1 ch, and 2 dc into the ring. Continue with this pattern to create a total of 6 groups of 2 dc separated by 1 ch (12 dc total). Close the round with a sl st. Rounds 2 to 5: Work 6 shells of 2 dc, 1 ch, and 2 dc in each shell, totaling 24 dc per round. Round 6: In the center of each shell, make 7 dc, and between each shell, make 1 sc. Round 7: Finish with a round of single crochet (sc) around the entire edge. Make a chain of 44. Starting from the hook, count 30 ch and join with a sl st to create a loop. Work sl st in each ch to the end of the cord. At the end, chain 2, make 5 hdc into the loop, totaling 6 hdc. Close with a sl st in the initial 3 ch and fasten off. Use a drop of Liquid Silicone Glue to secure the pendant onto the bell. Designer: Joana Gouveia, @FiosCruzados Disclaimer: Measurements are approximate due to differences between centimeters and inches, needle sizes and tension. All care has been taken to allow accurate completion of the pattern. See more about...
- Coconut Bucket Hat
Materials 1 ball of Anne (147g / 5.18 oz) or 1 ball of Anne (73g / 2.58 oz) for each color - Colors: 8176 (Off-White), 7382 (Chocolate); Círculo crochet hook - no. 2.5 mm. Size: One size fits all. Level of difficulty 07/05/2024 INSTRUCTIONS Stitches used: Chain stitch (ch.). Slip stitch (sl st.): Insert the hk., yo., pull up a loop, and pass directly through the loop on the hk. Single crochet: (sc.): insert the hk., yo., pull up a loop, yo. again, pull through all loops. Double crochet: (dc.): yo., insert the hk., yo., pull up a loop, yo., pull through 2 loops, yo. again, pull through all the loops. Top: follow the chart. Pattern stitch 1 and 2: follow the corresponding chart. Illustrative stitch: See chart - how to work charts 1 and 2. Sample: A 10 cm / 3.94" square in sc. with double yarn and a 2.5 mm hk. = 20 sts. x 18 rows. Instructions: The bucket hat is entirely worked with double yarn. Start at the top of the bucket hat. Make a ch. of 4 sts., close it into a circle, and work the top of the hat following the chart. After completing the chart, work around the side of the hat as follows: 1 row with Off-White yarn in pattern st. no. 1 following the corresponding chart, repeat from to in the direction of the sts. (23x), 1 row with chocolate yarn in pattern st. no. 2 following the corresponding chart, in front of pattern st. no. 1, repeat from to in the direction of the sts. (23x). Always repeat these two rows, but in the rows with Off-White yarn, pick up also the 2 ch. of the pattern st. with the chocolate ch. (see illustration stitch). The charts are finished. For the brim, work all around 11 rows in sc. with chocolate yarn. Make the 1st row of sc. working through both thicknesses of the pattern sts. on the sides. Once the 11 rows in sc. are finished, fasten off. Artisan: Henrique Silva Disclaimer: Measurements are approximate due to differences between centimeters and inches, needle sizes and tension. All care has been taken to allow accurate completion of the pattern. See more about...
- Sandy Bucket Hat
Materials 2 balls of Anne (147g / 5.18 oz) or 4 balls of Anne (73g / 2.58 oz) - Color: 8176 (Off-White); 2.5 mm Círculo crochet hk.; Tracing paper; Pencil; Scissors; Tape measure. Size: One size fits all. Level of difficulty 07/05/2024 INSTRUCTIONS Crochet stitches used: ch.: chain stitch, sl st.: slip stitch, sc.: single crochet, dc.: double crochet, bucket hat: follow diag. 1. Abbreviations: foll.: following, hk.: hook, R.: row, diag.: diagram, st.: stitch, sts.: stitches, wk.: work Sample: A 10 cm / 3.94" square in dc. with a 2.5 mm hk. = 22 sts. x 11 R. Instructions: Transfer the molds to tracing paper to use as a reference when making the piece. Note the arrows on the measurement chart indicating the direction of the work. Bucket hat: Use a 2.5 mm crochet hk. and Anne yarn (double strand) in Off-White color, start the piece from the top of the head. Make a magic ring, 1st R.: 3 ch., 13 dc., 1 sl st. to close the R. From the 2nd to the 20th R., continue following diag. 1. Wk. the entire piece in circular R. Artisan: Círculo Studio Disclaimer: Measurements are approximate due to differences between centimeters and inches, needle sizes and tension. All care has been taken to allow accurate completion of the pattern. See more about...
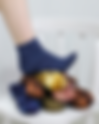
- Midnight Wave Socks
11/08/2024 Level of difficulty This pair of socks is knitted toe-up, so it’s totally customizable. It uses an after-thought heel, which is easy to replace when worn out. MATERIAL 100 g / 3.52 oz of Lucky Feet - color 9172 1 kit of 4 or 5 dpns (double-pointed needles) size 2. You can also use a long circular needle size 2 with two magic loops; in this case, ignore references to dpns. 1 fine tapestry needle to graft stitches and hide ends. You should know how to cast on stitches invisibly to begin a sock by the toe (we recommend Judy’s magic cast-on), how to bind off stitches in a loose and stretchy way and how to graft stitches. Abbreviations BOR = beginning of round dpn(s) = double pointed needle(s) k = knit k2tog = knit two stitches together. kfb = knit one stitch from the front and the back (1 stitch increased) p = purl ssk = slip 1 stitch knitwise, slip another stitch knitwise, insert the left needle through the front of the 2 slipped stitches and knit them together. st = stitch, stitches Gauge 2 inches = 13 st × 19 rounds Sizes: 12, 13, 3 [children] (6, 9, 11 [women]), 8, 10, 12 [men] Sock Length: 7, 8, 8½ (8½, 9½, 10¼), 9½, 10¼, 10¾ inches Sock circumference: 6¼, 6½, 7½ (7¾, 8½, 9¼) 8½, 9¼, 9¾ inches Execution TOE Using Judy’s magic cast-on (or any other method that you prefer), cast on a total of 20, 22, 24 (24, 24, 24) 24, 24, 24 st on two dpns [10, 11, 12 (11, 12, 12) 12, 12, 12 st on each dpn]. Note: First half of stitches: instep. Next half of stiches: sole Round 1: knit. Round 2: k1, kfb, k to last 2 st, kfb, k1, repeat from Repeat rounds 1 and 2 until you get 40, 44, 48 (52, 56, 60) 56, 60, 64 st total. As soon as you get to 32 st total, it’s easier to distribute your stitches evenly on all dpns. Mark the beginning of the rounds with a marker/piece of thread in the first st. K 1 round. Note: First half of stitches: instep. Next half of stiches: sole Customization note: try the sock on to check if the circumference is ok before going on. FOOT Moss stitch: Rounds 1 and 2: k1, p1, repeat from until end of instep. Knit sole stitches. Rounds 3 and 4: p1, k1, repeat from until end of instep. Knit sole stitches. Repeat these 4 rounds for 44, 54, 54 (50, 56, 64) 56, 60, 60 rounds or until the sock reaches the beginning of the leg. End with an odd round. Next Round: Make the corresponding even round but knit just the instep. Use a piece of waste yarn (preferably cotton or other slippery yarn in a distinct color but similar thickness) to knit the sole st. Return to the end of instep and knit the sole again with the working yarn. The waste yarn will hold the heel stitches together until it’s time to make the heel. LEG Rounds 1 and 2: k1, p1, repeat from until end of instep. Knit sole stitches. Rounds 3 and 4: k2, p1, k1, repeat from until 2 st to end of instep; k2. Knit sole stitches. Rounds 5 and 6: k4, k1, p1, repeat from until 4 st to end of instep; k4. Knit sole stitches. Rounds 7 and 8: k6, p1, k1, repeat from until 6 st to end of instep; k6. Knit sole stitches. Follow this same pattern reducing the number of moss stitches until all the stitches are knitted plain. Next 8, 8, 8 (10, 10, 10) 12, 12, 12 rounds: k (You can knit more or less rounds if you want a longer or shorter leg) Next 20 rounds: k2, p2, repeat from Bind off loosely. HEEL With one dpn, pick up stitches along the bottom of the waste yarn. With another dpn, pick up stitches above the waste yarn. Now you have 40, 44, 48 (52, 56, 60) 56, 60, 64 st total on your dpns. You can reorganize them as you wish. Mark BOR (always between instep and sole stitches). Carefully remove the waste yarn. Setup round: Knit. When you get to the gap between sole and leg stitches, pick up 1 additional twisted st. Repeat on the other side. Now shape the heel: Round 1: k1, ssk, k to 3 st before end of the first half of heel, k2tog, k1, repeat from Round 2: k Repeat these two rounds until you have 5, 5, 5 (9, 9, 9) 9, 9, 9 st between decreases. Graft sole stitches to leg stitches to finish off the heel. With a thin tapestry needle, hide your ends. Designer: Círculo Studio Disclaimer: Measurements are approximate due to differences between centimeters and inches, needle sizes and tension. All care has been taken to allow accurate completion of the pattern. See more about...
- Magenta Top With Ruffles
03/08/2023 Level: Intermediate Size: 14 Material Yarn Quantity by Size - color #6092 (Magenta); XS : 2 balls of Anne Sparkle / 4 balls of Anne 250 S : 2.5 balls of Anne Sparkle / 5 balls of Anne 250 M : 2.75 balls of Anne Sparkle / 5.5 balls of Anne 250 L : 3 balls of Anne Sparkle / 6 balls of Anne 250 XL : 3 balls of Anne Sparkle / 6 balls of Anne 250 2X : 3.5 balls of Anne Sparkle / 7 balls of Anne 250 Crochet hook D-3 or size to obtain gauge; Measuring tape, tapestry needle and scissors. Created by: Angela Schmitt Disclaimer: Measurements are approximate due to differences between centimeters and inches, needle sizes and tension. All care has been taken to allow accurate completion of the pattern. See more about...
- Gravel Bag
11/04/2024 Level of difficulty MATERIALS 1 skein of T-shirt yarn – Colors: 8001 (White) e 8225 (Chromium); 9.0 mm Círculo crochet hook; 2 Círculo round metal handles- 12.5 cm – Color: 10 (Silver); Fabric for the lining. Stitch Glossary and Abbreviations: chain (ch.). Slip stitch (slst): insert the hook, yo, draw it through the st and the loop on the hook. Single crochet (SC): insert the hook, yo, draw it through the st, yo, draw it through both loops on the hook. Half double crochet (HDC): yo, insert the hook, yo, draw it through the st, yo, draw it through all 3 loops on the hook. Finishing stitch: leave the yarn on the WS of the work and insert the hook from the RS between 2 sts from the previous round, yo, draw it through the sts, leave it on the hook; insert the hook between the 2 next sts, yo and draw it through the sts, draw it through the loop already on the hook . Base: follow the chart. Elongated stitch pattern: follow the chart. Gauge: 10 x 10 cm square in SC, using a 9.0 mm hook = 10 sts x 10 rows. One size only Execution: Bag– start by the base. Using the color Chromium ch 6, slst into the 1st st to join the round and make the base following the chart. Make 2 rnds in white, 2 in chromium and 2 in white again. When you finish the base, follow the body st pattern, according to the chart. Make the 1st rnd with 58 sts on the BLO. Continue working in the round with the same number of sts, end each rnd with a slst into the 1st st and start the next one with a ch 1, until you’ve worked 4 rounds after the base. Follow the chart, working in the elongated stitch pattern and changing colors as indicated. After you finish the chart, work in HDC as follows: 2 rnds in white, 1 in chromium, 2 in white; then make 1 rnd of SC and 1 finishing stitch rnd in chromium, then fasten-off. When making the SC rnd attach one handle to each side, as follows: 10 SC, make the next 9 SC attaching the handle when making the sts, 20 SC, 9 more SC attaching the second handle. Finish the rnd with the last 10 SC. Finishing– cut the lining and seam it to the bag. Designer: Kathia Roberta Beillo Moraes Pattern review: Patty Wolf Pattern translation: Beatriz Magalhães (@bybeacrochet) Disclaimer: Measurements are approximate due to differences between centimeters and inches, needle sizes and tension. All care has been taken to allow accurate completion of the pattern. See more about...
- Fluffy, the Fuzzy Koala
11/03/2024 Level of difficulty MATERIALS 1 skein of Amigurumi in the colors: 6006 (Candy Lilac) e 6399 (Azalea); 1 skein of Amigurumi Pelúcia in the color 8001 (White); 2.5 mm crochet hook; Black safety eyes (8 mm); Stuffing; Tapestry needle. Stitch Glossary and Abbreviations: Increase = inc.; Chain = ch; Decrease = dec; Double crochet = DC; Single crochet = SC. Approximated Size: 7.87 in Execution: Head Using Amigurumi yarn in the color 6006 (Candy Lilac) 1st round: 6 SC into a magic ring; 2nd round: 6 inc. = 12 SC; 3rd round: 1 SC, 1 inc. = 18 SC; 4th round: 2 SC, 1 inc. = 24 SC; 5th round: 3 SC, 1 inc. = 30 SC; 6th round: 4 SC, 1 inc. = 36 SC; 7th round: 5 SC, 1 inc. = 42 SC; 8th round: 6 SC, 1 inc. = 48 SC; 9th round: 7 SC, 1 inc. = 54 SC; 10th to 16th round (7 rounds): 54 SC; 17th round: 8 SC, 1 inc. = 60 SC; 18th to 25th round (8 rounds): 60 SC Place the safety eyes between rounds 18 and 19, with 10 stitches between them. 26th round: 8 SC, 1 dec. = 54 SC; 27th round: 7 SC, 1 dec. = 48 SC; 28th round: 6 SC, 1 dec. = 42 SC; 29th round: 5 SC, 1 dec. = 36 SC; 30th round: 4 SC, 1 dec. = 30 SC; 31st round: 3 SC, 1 dec. = 24 SC; 32nd round: 2 SC, 1 dec. = 18 SC Stuff the piece. 33rd round: 1 SC, 1 dec. = 12 SC; 34th round: 6 dec. = 6 SC Fasten-off using the inverted magic ring technique. Body Start with Amigurumi yarn in the color 6006 (Candy Lilac) 1st round: 8 SC into a magic ring; 2nd round: 8 inc. = 16 SC; 3rd round: 1 SC, 1 inc. = 24 SC; 4th round: 2 SC, 1 inc. = 32 SC; 5th round: 32 SC; 6th round: 3 SC, 1 inc. = 40 SC; 7th round: 4 SC, 1 inc. = 48 SC; 8th to 14th round (7 rounds): 48 SC; 15th round: 4 SC, 1 dec. = 40 SC; 16th to 18th round (3 rounds): 40 SC; 19th round: 3 SC, 1 dec. = 32 SC; 20th to 22nd rounds (3 rounds): 32 SC; 23rd round: 2 SC, 1 dec. = 24 SC; 24th round: 24 SC Fasten-off, leaving a yarn tail for seaming. Stuff the piece. Seam it to the head. Snout Using Amigurumi yarn in the color 6399 (Azalea) 1st round: 8 SC into a magic ring; 2nd round: 1 SC, 1 inc. = 12 SC; 3rd and 4th rounds: 12 SC; 5th round: 2 SC, 1 inc. = 16 SC; 6th round: 16 SC; 7th round: 2 SC, 1 dec. = 12 SC; Stuff it, fold it in half and seam it to rounds 17 and 24 of the head. Using Amigurumi Pelúcia in the color 8001 (White), embroider 2 straight lines at the bottom of the snout. Outer ear (2) Using Amigurumi yarn in the color 6006 (Candy Lilac) 1st round: 8 SC into a magic ring; 2nd round: 8 inc. = 16 SC; 3rd round: 1 SC, 1 inc. = 24 SC; 4th round: 24 SC; 5th round: 2 SC, 1 inc. = 32 SC; 6th to 8th rounds (4 rounds): 32 SC Work flat; ch 1 and turn at the end of each row. 9th and 10th rounds: 16 SC; 11th round: 1 dec., 12 SC, 1 dec. = 14 SC; 12th round: 1 dec., 10 SC, 1 dec. = 12 SC; 13th round: 32 SC around the ear; 14th round: 2 SC, 1 dec. = 24 SC Fasten-off, leaving a yarn tail for seaming. Seam it between rounds 7 and 19 of the head, curving it slightly to shape it and leaving the flat rows at the bottom.. Ear spots (2) Using Amigurumi Pelúcia in the color 8001 (White) 1st round: 6 DC into a magic ring; 2nd round: 6 SC Fasten-off, leaving a yarn tail for seaming. Seam it to the outer part of the ear, close to the head. Belly spot Using Amigurumi Pelúcia in the color 8001 (White) Ch 7. 1st round: skip 2 chs, 4 DC, 4 DC into the last chain, 4 DC on the other side of the chs = 12 DC; 2nd round: 4 DC, (1 DC, 1 inc. in DC) 4x, 4 DC = 16 DC Fasten-off, leaving a yarn tail for seaming. Seam it close to the neck. Arms (2) Using Amigurumi in the color 6006 (Candy Lilac) 1st round: 6 SC into a magic ring; 2nd round: 6 inc. = 12 SC; 3rd round: 1 SC, 1 inc. = 18 SC; 4th to 7th rounds (4 rounds): 18 SC; 8th round: 7 SC, 1 dec. = 16 SC; 9th round: 1 dec., 6 SC = 14 SC; 10th round: 14 SC; 11th round: 5 SC, 1 dec. = 12 SC; 12th to 20th round (9 rounds): 12 SC; 21st round: 2 SC, 1 dec. = 9 SC Fasten-off, leaving a yarn tail for seaming. Stuff it until the 18th round Fold it in half and seam it to the body. Legs (2) Start with Amigurumi in the color 6399 (Azalea) 1st round: 6 SC into a magic ring; 2nd round: 6 inc. = 12 SC; 3rd round: 1 SC, 1 inc. = 18 SC; 4th round: 18 SC Switch to Amigurumi in the color 6006 (Candy Lilac) 5th round (in the back loop only): 2 SC, 1 inc. = 24 SC; 6th round: 24 SC; 7th round: 6 SC, 6 dec., 6 SC = 18 SC; 8th to 10th round (3 rounds): 18 SC; 11th round: 1 SC, 1 dec. = 12 SC; 12th round: 12 SC; 14th round: 12 inc. = 24 SC; 15th round: 2 SC, 1 inc. = 32 SC; 16th to 18th rounds (3 rounds): 32 SC; 19th round: 2 SC, 1 dec. = 24 SC; 20th round: 12 dec. = 12 SC Fasten-off, leaving a yarn tail for seaming. Stuff it until the 12th round Fold it in half and seam it to the body. Tail Using Amigurumi in the color 6006 (Candy Lilac) 1st round: 6 SC into a magic ring; 2nd round: 6 inc. = 12 SC; 3rd round: 1 SC, 1 inc. = 18 SC; 4th round: 18 SC; 5th round: (3 SC, 1 dec., 2 SC, 1 dec.) = 14 SC Fasten-off, leaving a yarn tail for seaming. Seam it between rounds 6 and 11, on the back of the body. Designer: Shirley Borges (@pepetosarteemcroche) Pattern review: Patty Wolf Pattern translation: Beatriz Magalhães (@bybeacrochet) Disclaimer: Measurements are approximate due to differences between centimeters and inches, needle sizes and tension. All care has been taken to allow accurate completion of the pattern. See more about...
- Popcorn Bag
11/02/2024 Level of difficulty MATERIALS 2 Náutico Poly yarn rolls – Color #7148 (Craft); Crochet hook – 6.0 mm; Sewing needle – Size #2; 1 Maxxi Retrós thread – Color #927 (Atacama); Square Wooden Handle, Size: 5.5” x 5.5" – Color #10; Tapestry needle; Cotton calico fabric for bag lining; Scissors; Measuring tape. Abbreviations: r.: row , rnd.: round , diag.: diagram , st.: stitch , sts.: stitches , rep.: repeat , mk.: make . Stitch Glossary: ch.: chain , sl st.: slip stitch , sc.: single crochet , dc.: double crochet , , popcorn st.: pull the loops of 4 double crochets onto the hook and close them together with 1 sl st., bag base: follow diag. 1, strip for the sides and bottom of the bag : follow diag. 2. Gauge: A 4-inch square in the stitch of the bag base and using a 6.0 mm crochet hook = 10 sts. x 5 rows. Aproximated size: 13” x 18” Execution: Bag base (front part): use Náutico Poly Yarn and a 6.0 mm crochet hook. Start the piece from the bottom, working in back-and-forth rows. Work a 45-ch cord; on this cord, work following diagram 1 and the repeat pattern from the 1st to the 17th row.For finishing, work 1 rnd. of sc. all around the piece. Switch to the tapestry needle and attach the handle to the center of the piece with basting stitches. Set the piece aside. Bag base (back part): the same as the front part of the bag. Strip for the sides and bottom of the bag: use Náutico Poly Yarn and a 6.0 mm crochet hook. Start the strip with a 7-ch cord, work following diag. 2 and repeat until you reach a length of 30 inch. Work in back-and-forth rows. Fasten off the yarn and set the piece aside. Assembly: use Náutico Poly Yarn and tapestry needle. Join the front and back by sewing the strip to the sides and bottom of the bag. Attach the lining using the sewing needle and Maxxi Retrós thread with basting stitches. Designer: Kathia Beillo Pattern review: Patty Wolf Pattern translation: FuriFuri Amigurumi Disclaimer: Measurements are approximate due to differences between centimeters and inches, needle sizes and tension. All care has been taken to allow accurate completion of the pattern. See more about...
- Thanksgiving E-book
This Thanksgiving holiday, let yourself be swept away by the love and unconditional support between the super cute couple Lara and Raul! Enjoy! eBook Here Disclaimer: Measurements are approximate due to differences between centimeters and inches, needle sizes and tension. All care has been taken to allow accurate completion of the pattern. See more about...